installation

  • LED Home Lighting Make Over Video

    LED 14" ceiling light LED-JR002BRZ 
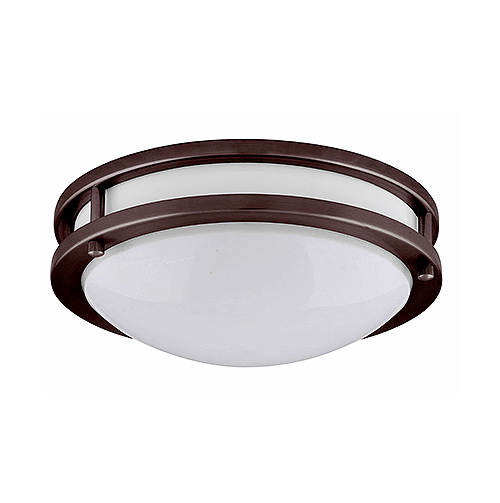
LED-JR002BRZ dimmable ceiling light at only 20watts, 1800 lumens

    We decided to bless a family with a LED lighting make over that not only will reduce their energy use but also looks and feels amazing increasing not only the value of the home but also their quality of life!

    In this LED make over we installed five of our LED 14" two ring bronze ceiling lights in 3000K that flush mounts to almost any junction box throughout the hallways. We also installed five Green Watt LED 6" white reflector retrofit trim in 4100K in the kitchen. Both lights are dimmable. We explain more of why we chose a 3000K in the living spaces and 4100K in the kitchen in the video.

    LED 6" white reflector trim recessed lighting G-DL6D 
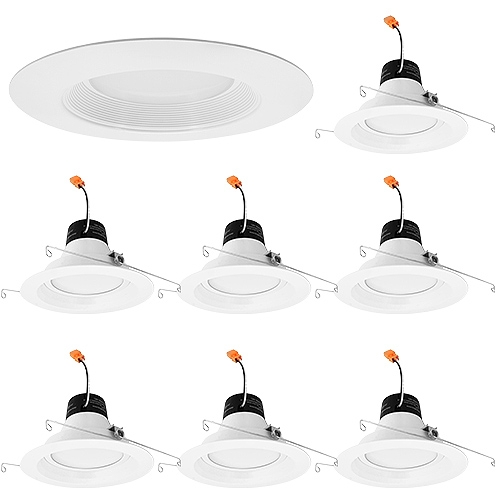
LED 6" white reflector trim 4100K dimmable at only 15watts, 950 lumens

    Watch as we take old power hungry boring incandescent lights and easily swap them out with designer bronze LED ceiling lights that will last thousands and thousands of hours reducing the home owner's maintenance costs and energy consumption.

    You will see how an understanding and creative use of color temperature can take standard track home recessed lighting in a dimply lit kitchen from ordinary to amazing with a few simple steps!

    In the middle of the LED make over we discovered that the master bedroom closet was poorly lit with a flickering fluorescent cloud fixture. We couldn't let the home owner continue living in this monstrosity. So we swamped that out too!

    So sit back, pull up a snack or two and watch as we transform the mundane into the extraordinary and perhaps along the way you may learn something new :)

    Posted in:

    Tags: installation, 6" recessed lighting, going green with led recessed lighting, kitchen lighting, video, Surface Lights, Ceiling Lights

  • LED Under Cabinet Lighting Overview & Installation Tips Video

    LED Under Cabinet LightsWe thought you would like to know more about our new LED under cabinet lighting fixtures so we made a overview video showing the many features of our new addition. We reveal to you what comes in the box, available finishes, different lengths as well as helpful tips on how best to install the LED light for common applications plus much much more!

    Sit back and discover the simplicity of Total LED under cabinet lighting!

    Our LED Under Cabinet Lights

    • Rated at 40,000 hours
      • Warm white light at 3000K
    • High / Low Rocker switch for high low light setting
    • Five lengths at five wattages:
      • 12" at 5watts
      • 21" at 7watts
      • 24" at 9watts
      • 33" at 13watts
      • 42" at 16watts
    • Three finishes available: Bronze, Satin Nickel and White
    • 1" low profile with slim steel body
    • Frosted glass lens for pleasing soft light
    • Link up to 10 units
    • No additional transformer or driver is required!
    • Common household 120volt input
    • Two installation options: Portable plug-in or hard wire option
      • Portable plug-in option includes 6ft. power cord for standard electrical wall outlet use
      • Hard wire option can be directly connected by knockouts with included 1/4" Romex connector and grounding screw and wire
    • ETL listed

    Posted in:

    Tags: Line Voltage, installation, led, LED under cabinet lighitng, kitchen lighting, video

  • Sylvania Ultra LED Disc Light for Recessed & Surface Lighting

    Sylvania Ultra LED Disc LightSylvania Ultra LED Disc Light is a perfect solution for either recessed lighting or ceiling lighting junction box applications for bringing energy saving LED lighting to virtually any recessed light or light connected to a compatible junction box. See our video below or click here for more details. Discover the benefits of LED and see how simple it is to install the LED Disc Light in both a recessed lighting can or a junction box in your ceiling with our video guide helping you make the transition to LED lighting as easy as possible.

    Currently available in two lumen options of 700 lumen or 900 lumen, the Sylvania Ultra LED Disc light is ideal for use in kitchens, bath rooms, closets, hall ways and in many areas where older incandescent recessed lighting or ceiling lighting is currently being used. The Sylvania LED disc light offers the light you need with the flexibility you want.

    Looking to spice up your lighting with more then just LED light? No problem! Add a bit of designer flare with the optional decorative trim rings available in three different finishes: Bronze, Satin and Black. Watch our video below on how these are installed below or by clicking here.


    Videos


    Like us on Facebook

    Follow us on Twitter

    Plus us on Google

    Follow us on LinkedIn

    Subscribe to our Youtube Channel

    Posted in:

    Tags: installation, Sylvania, overview, Surface Light, Trim Rings, video

  • Cutting a Hole in Your Plaster Ceiling for Recessed Lighting

    Note: this article is reprinted in its entirety with permission from the blog of the nice folks at Hole Pro. We get a lot of customers with questions in regards to cutting the holes for recessed lighting. Often, mistakes are made-some of which are very difficult to correct for. We think you will find their article very helpful-particularly if you have a plaster ceiling (be it new or old). Be sure to visit their web site for more of their product information. Although we don't have any holes to cut right now, we're trying to think of excuses to buy one of these (Hole Pro)! Thank you to Hole Pro for letting us reprint their article.

    Adjustable Hole Saw Cutter Kit

    There are many times when one or more holes need to be made in a plaster ceiling, whether for recessed light cans, audio speakers, a heating or air conditioning duct, or to add a ceiling fan. Plaster ceilings have been done in different ways in different parts of the country and at different times. After 1950 most plaster ceilings have a metal lath. In prior years the lath could be metal, chicken wire, or wood. In many cases the nails that originally held the pieces of lath in place have largely disappeared from corrosion over the years.

    We recommend treating the plaster ceiling hole cutting operation as a two stage process. First cut the plaster and remove the plug. Second cut the lath using the hole in the plaster as a guide. The Hole Pro adjustable hole cutters make a clean straight cutout hole in the plaster for the can light or ceiling speaker and with the straight edge the grill or trim rings will sit flush against the surface of the ceiling. With the circular scoring motion of the tungsten carbide cutting blades the two layers of the plaster are not likely to separate and cause a crack in the ceiling (which can be very expensive to repair).

    The best tool for cutting the lath depends upon the material used. For standard metal lath a carbide grit reciprocating saw blade works very well. For wood lath a fine tooth bi-metal reciprocating saw blade usually works the best. For chicken wire it is best to use diagonal cutting pliers (dikes) or snips to cut the wire lath.

    In theory it would be simpler to use a continuous edge tungsten carbide rim grit hole saw and cut through all three layers. Their good reasons why this is often not the case. It comes down to cost. Each size of carbide grit hole saw costs between $45 and $80 depending upon the brand and the hole saw only works for one size hole. The sizes provided by all manufacturers (Milwaukee, Greenlee, MK Morse, Lenox) are limited to 3-3/8″, 4-3/8″, 5-3/8″, 6-3/8″, 6-5/8″, 6-7/8″. With more than 20 common recessed can light cutout sizes needed the sizes available are seldom going to work.

    Adjustable Hole Saw Cutter Kit

    Posted in:

    Tags: Hole cutting, installation, cutting a hole for recessed lighting

  • Installing Recessed Can Lights in Ceilings

    Note: this article is reprinted in its entirety with permission from the blog of the nice folks at Hole Pro. We get a lot of customers with questions in regards to cutting the holes for recessed lighting. Often, mistakes are made-some of which are very difficult to correct for. We think you will find their article very helpful. Be sure to visit their web site for more of their product information. Although we don't have any holes to cut right now, we're trying to think of excuses to buy one of these (Hole Pro)! Thank you to Hole Pro for letting us reprint their article.


    Installing recessed can lights or high hats in ceilings has gotten more complicated with all the new sizes of LED, PAR, and CFL light fixtures. Instead of three common hole cutout sizes for the majority of recessed can lights (6-3/8, 6-5/8, 6-7/8 inches, there are now more than 27 common sizes and very few in these traditional diameters.

    For example the Halo brand of recessed light cans sold by Amazon, Lowe’s, Home Depot, and others, have manufacturer recommended cutout hole sizes of 3-3/4″, 4-1/4″, 5-1/2″, 6-1/4″, 6-7/16″ for the different size can lights. Another common recessed can light manufacturer is Juno and for their can lights one needs cutout holes of 3-1/4″, 4-3/8″, 5-1/2″ 6-3/4″, 6-7/8″. And this is just for the residential high hats or recessed ceiling lights. Commercial can lights can require cutout holes larger than 8 inches in diameter. So one can spend hundreds of dollars on continuous rim grit hole saws and still not have the right hole saw sizes for the most common can lights. Or for $129 a Hole Pro model X-230 hole cutter can cut any size cutout hole needed from 1-7/8 to 9 inches in diameter.

    There are a number of important advantages to using a Hole Pro adjustable hole cutter to make the cutout holes for recessed can lights (or downlights). First is the ability to make the exact size hole needed in whatever ceiling material is to be cut. For thick plaster a slightly larger cutout hole may be needed to provide room for pushing up a remodel style can light into the ceiling space. With soft sheetrock a close fit may be needed with smaller LED can lights like the 3 inch and 4 inch models from Utilitech sold by Lowe’s and the Con-Tech fixtures sold by Home Depot.

    Most of the manufactures have stopped publishing the cutout dimensions so one does not the exact hole size needed until the light cans have been purchased and one can measure the template in the box. Often the template is the same for all models from the manufacturer and may be too small for some of the variations, especially with the remodel light cans. With the remodel or retrofit type of recessed ceiling can light the entire fixture has to slip through the opening and often the size of the opening is dictated by the arm that attaches the fixture to the electrical junction box. Some designs, like the Halo in particular, make it much more difficult to insert the can light assembly.

    The Halo H5RICAT (“5″ indicates 5″ fixture, “R” indicates remodel/retrofit type and the “I” indicates that it is OK for direct contact with insulation) comes with a template for a 5-1/2 inch size cutout hole. In an actual installation the tape that is wrapped around the light can to help make a good air seal increases the outer diameter of the light can so it requires a 5-5/8″ cutout at a bare minimum and 5-11/16 inches is a safer size to minimize damage  to the sheetrock.

    The “air tight” ceiling fixtures when installed properly can significantly reduce loss of heated air from living spaces up into the attic. All the air tight fixtures I have examined from the major suppliers are cheaply modified with a thin strip of insulating tape that probably adds 2 cents to the manufacturing cost and does a poor job of providing an air seal. A foam sealant would do a much better job.

    The H750RICAT is supposed to fit through a 6-1/4″ cutout hole cut but actually the can light needs a hole at least 6-3/8 inches in diameter for the can portion of the fixture.

    The Halo H750RICAT recessed remodel light can is most easily installed through a 6-1/2 inch opening so that the junction box and can cylinder and the thick arm bracket (outlined in red in the picture) all fit through the opening in the ceiling.

    Some of the less expensive remodel type can lights have a thin metal arm that is 1/8″ thick strap steel and which makes them much easier to insert in the ceiling opening. This thin bracket is shown in the picture outlined in red.

    When making the cutout holes for recessed can lights the Hole Pro adjustable hole cutter makes it faster and a lot safer with its adjustable cutting depth control The cutting depth can be set so that the blades only cut the sheetrock or plaster or tongue and groove wood ceiling and nothing more. No worries about accidentally cutting an electrical wire, low voltage audio wire, or plumbing pipe in the ceiling space and turning a small project into an expensive repair job.

    The Hole Pro hole cutters also save a lot of time when installing downlights. The hole can be cut faster than a cutout circle can be drawn on the ceiling with the template. It is easy to cut a perfect round hole even with only one hand to hold the drill with the hole cutter when high up on a ladder. The ABS plastic shield is ball bearing mounted so only the hole cutter spins and all the dust and shavings and the cut plug all stay in the shield. Invert the shield over a bucket and everything falls out and the hole cutter is ready for the next hole.

    A lot of time is saved when one only needs to place the hole cutter’s pilot drill bit in the center of the spot for the cutout and start to drill. No need to move furniture or lay out a tarp or get out the shop vacuum.

    Posted in:

    Tags: Hole cutting, hole cutting for recessed lights, installation

5 Item(s)